Using the API
This is a simple overview on how you can use the API for live streaming.
After running the application with the make command you should find it running on localhost. Move over to /docs. where you should find the swagger docs for the API.
Creating user
Open PostMan or you could do it in the swagger docs dose not really matter since there is HttpOnly Cookie for authentication.
If yo hit post request on the route signup with the data as similar to given below then you should get 201 created response.
{
"username" : "example_user",
"password" : "HelloExampleUser123@"
}
201 created response:
{
"username": "example_user",
"id": 2,
"first_name": null,
"last_name": null
}
Note
If you miss-out or send wrong data to the backend then you should get an 400 bad request response with the error message.
Example bad request where we send only only character for username.
{
"username" : "a",
"password" : "HelloExampleUser123@"
}
Error response:
{
"statusCode": 400,
"message": [
    "username must be longer than or equal to 3 characters"
],
"error": "Bad Request"
}
Logging the user in
If you send post request to login then you should get two tokens as response
Access Token
Refresh Token
{
"username" : "example_user",
"password" : "HelloExampleUser123@"
}
201 Response:
{
"accessToken": "eyJhbGciOiJIUzI1NiIsInR5cCI6IkpXVCJ9.eyJ1c2VySWQiOjIsInVzZXJuYW1lIjoiZXhhbXBsZV91c2VyIiwidHlwZSI6ImFjY2VzcyIsImlhdCI6MTY3Mzc3ODcwNywiZXhwIjoxNjczNzc5OTA3fQ.vo4wXZendK-OGKDvHAabFTnrqVls21swrC34w_ueQcY",
"refreshToken": "eyJhbGciOiJIUzI1NiIsInR5cCI6IkpXVCJ9.eyJ1c2VySWQiOjIsInR5cGUiOiJyZWZyZXNoIiwiaWF0IjoxNjczNzc4NzA3LCJleHAiOjE2NzQzODM1MDd9.VrMZwiR5ncPZ0w6n1rLK9SKL43ARy2-4D9RuM1VNik4"
}
Now we can access protected routes using the accessToken.
Creating user’s Channel.
To stream videos user needs to have a channel. By default a user dose not have a channel if you get the /user/channel route then you should get the following response.
{
"statusCode": 404,
"message": "User does not have a channel",
"error": "Not Found"
}
So you need to create a channel for the user. Send post request on /user/channel then you should get the following output.
{
"id": 2,
"status": "IDLE",
"userId": 2,
"streamKey": "nxay4iw5uv"
}
Note
streamKey in the response is very important we need it to stream through OBS.
Creating a video to stream.
We can’t stream without a video. Before the user starts streaming they need a title for the stream which is provided by the video. Hence at least one video is required before starting to stream.
Send post request to /user/channel/videos
{
"title" : "my first live stream"
}
201 created response:
{
"id": 3,
"url": "8wdoq6npt4",
"title": "my first live stream",
"status": "CREATED",
"channelId": 2
}
Note
url in the response is also very very important since it is the only only of accessing our live stream later on.
Streaming Using OBS
Get your stream key and open OBS.
First we need to add the source which we want to stream. It can be anything your whole screen a game, your browser anything.
- 1
In button you should find a box named sources. In that box you should find a + button.

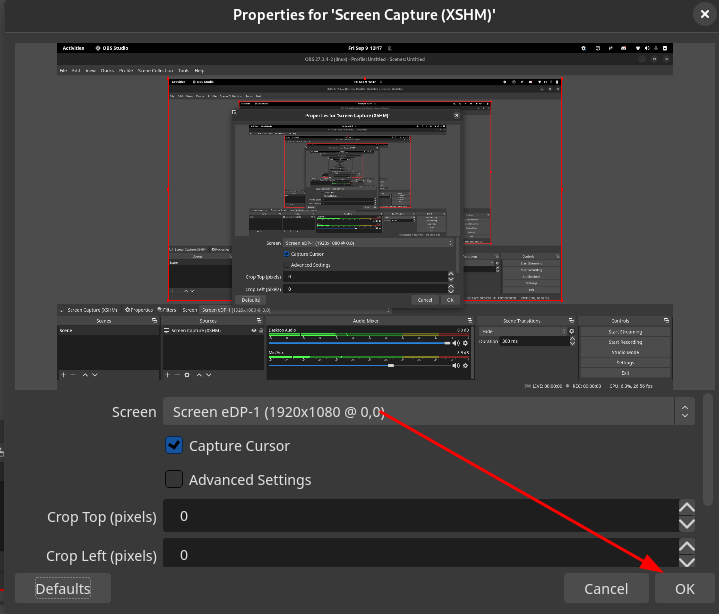
- 2
After clicking on it you should see a box where you can select the screen. Select one screen and then click on ok.
Now that we have added source we should configure our stream key.
- 3
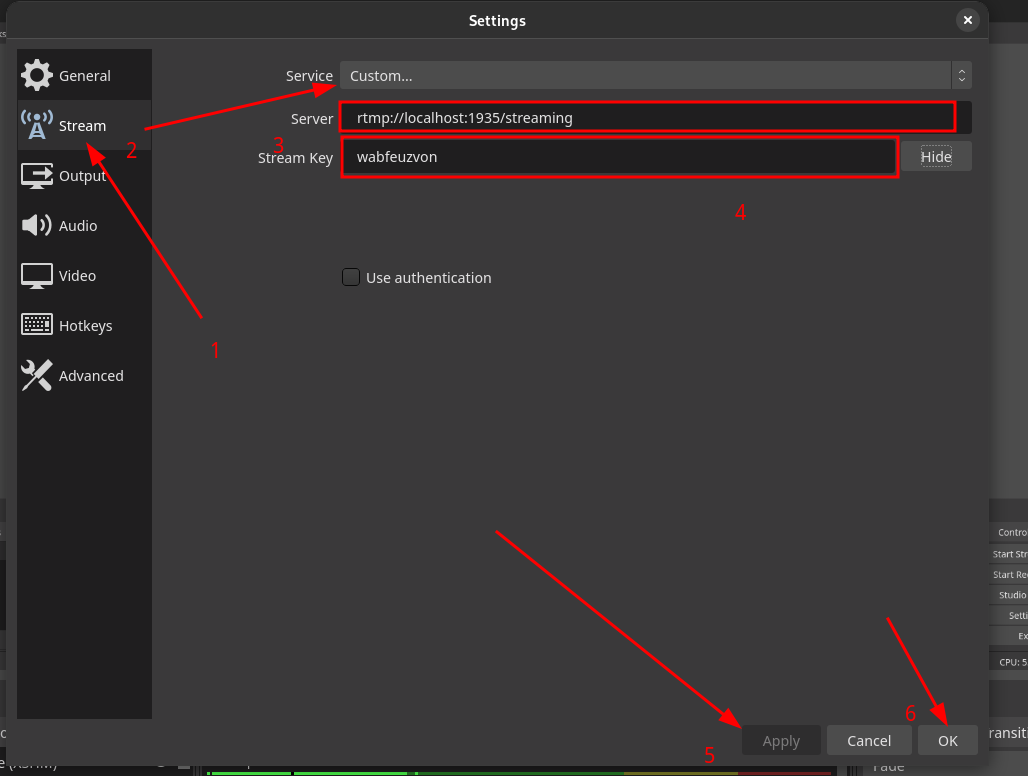
In the top left corner you should see File and when you click on it you should be able to find settings in the dropdown. Open settings and go to Stream option.
You should see 3 boxes there.
- 4
Change the the in the Services box to Custom
- 5
Change the server to
rtmp://localhost:1935/streaming
Note
If you have changed the port of the RTMP server then use that port.
- 6
Get the stream key from
localhost:8000/user/channeland paste it in the Stream Key section. Then click on Apply and Ok.
Now we should be able to stream.
- 7
Click on start streaming.

Your stream should start now.
Accessing the Stream
Since the stream has now started, To watch the stream head over to hls-demo-app.
Now we need our video’s url which we were provided after creating the video.
If you don’t have it then get it from localhost:8000/videos/.
After this let’s go to the demo app. There you should find a input box for your video’s url.
- 8
Now fill in the following
http://localhost:8080/hls-live/your_video_url.m3u8
In my case it is http://localhost:8080/hls-live/8wdoq6npt4.m3u8
- 9
Now click on apply, you should be able to view your stream live.